adamiamelia

my babies

Showing posts with label simple living. Show all posts

Wednesday, January 8, 2014

Make your own noodles

My kids tend to go through a whole LOT of homemade playdough. Yours too? How about we use that to our advantage and have them make their own lunch? hehe...

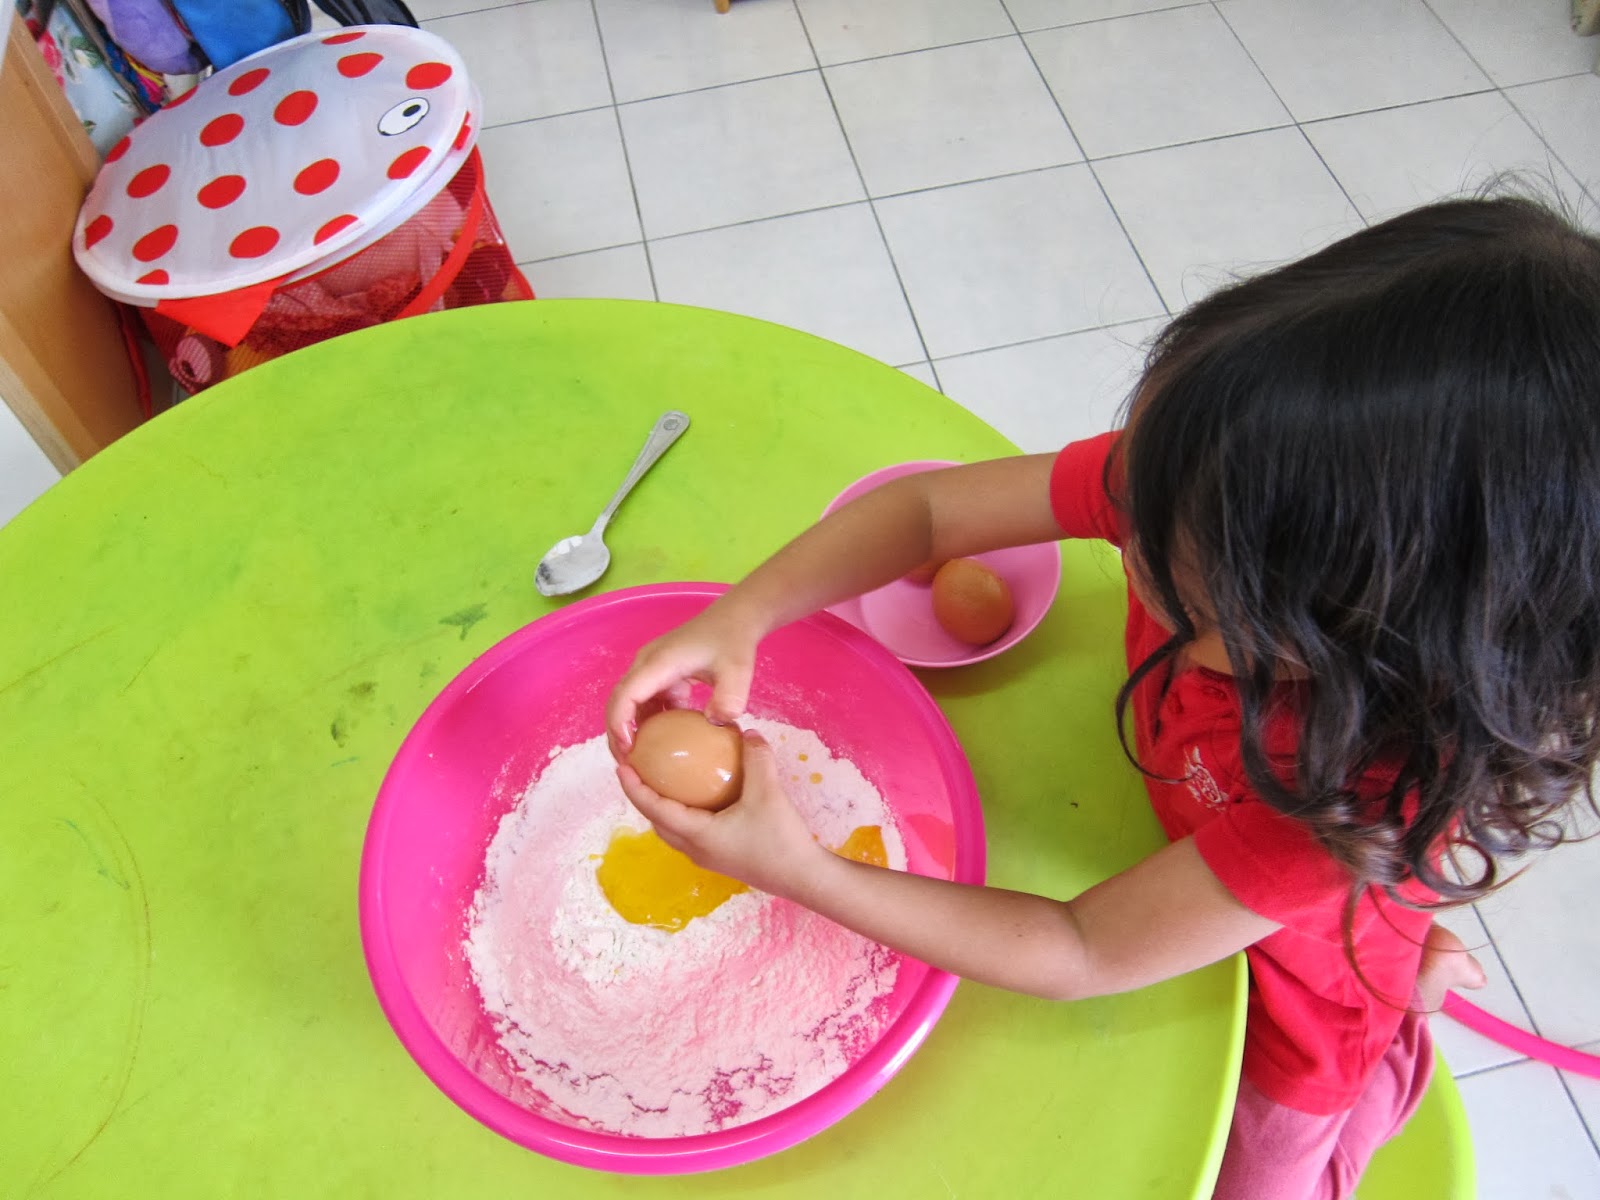
 The recipe is super simple. Only 2 ingredients. 500g of flour, and 5 eggs. Yup, that's it. Dump the flour into a huge bowl (pink bowl is a plus, obviously), make a hole and break the eggs into it. Mix it up. Knead. It makes a nice soft pliable dough. If you find it too wet, add a bit of flour. If too dry, add abit of water.


Then let the kids play with it. The longer you play with it, the better the dough will be.


Still playing the dough. Mia liked the texture so much that she asked for more the next day, just for playing.


Set your noodle maker on a floury table. I got ours from Giant, cheaply at around rm30+. It is very simple to use and the kids can operate it on their own. We were pretty much wrestling each other ( even me!) to get a turn to use the noodle maker.


When we're done this is what you get. Beautiful homemade noodles. Dry it on a kitchen towel.  You can use right fresh pasta right away or leave it to dry for a couple of hours, then keep it to use another day. It should keep for a week or two.


Freshly boiled pasta. Yum! It's a hit with the kids.

Oh, did I mention we go through a LOT of pasta too in this house?

Wednesday, March 6, 2013

Making soap from scratch

You know I like making things. For years I have studied and contemplated making my own soap from scratch. Not the simple melt and pour soap (that's not really making your own soap, is it. more like taking somebody else's soap and stamping your name on it), but the real, traditional way of making soap using oil, lye and water - saponification. Making soap the way it was made hundreds of years ago.  

Why use natural soap? Well, did you know that your regular bar of soap contains little to no soap at all, and is full of harmfull chemical and is more likely a detergent? Most commercial soap companies strip the glycerin out of the soap and sell it to the cosmetic industry because it is more valuable than the soap itself. Glycerin is a product of saponification, and it what keeps our skin hydrated and moisturised. anyway, you can read online many other reasons why using natural soap is better. I'm just going to now describe how I made my soap.

This is by no means a tutorial on the cold-process soapmaking. It was just how I made my soap. If you do try it however, make sure you have done proper research especially on lye safety. 


Ok so I started by assembling my equipments and material on the kitchen counter. the lye is not in picture because it was still hidden in my storeroom, and I wasn't going to take it out until I absolutely have to (hello, lyephobia much???)


Next I weighted my oils and melted my solid oils.


Then I weighted my water, in this case I used full cream milk that has been frozen and then blended to a slush.


Then I weighted my lye. Gigil tu tangan, ok. You MUST wear gloves, goggles, apron, long sleeves clothes when handling lye. If splashed, God forbid, it can burn through your skin, your kitchen counter, your floor, etc. Do not make soap while tending to children or pets.


Next I added the lye to my milk slush. Slowly.


Stirring constantly. Notice the colour has turned bright yellow and the milk has melted.


Ooops it turned bright orange. Lye solution made with milk can turn any shade from bright yellow to orange. I was hoping for a bright yellow but it's ok this will do as well. I colled the solution down in cold water.


When the temperature of both the lye solution and melted oils reached 45C, I added the lye solution to the oils.


Then I whisked by hand alternately with this old mixer. And the guess what happened? This £4, 3 year old hand mixer decided to die on me. Yes. Right in the middle of the action. Oh kayy. Major disaster. I do not want to be whisking 2 hours straight.


In it goes into my food processor. I have read that you can make soap in a blender, but there was no way this batch could fit in my blender. So I gambled and dumped the whole thing in the food processor.


It worked! I reached trace. Trace is when the texture becomes the consistency of pudding. Or susu pekat. When you drip on top of the mixture the drips stays on top.


Next I added calendula extract, because I am making calendula baby milk soap. Gave it another whizz in the food processor.


Ok then I poured the soap into a soap mold.


Looks yummy like caramel. Oh come to think of it the texture was kinda caramel-ish, too.


I freeezed it. Was trying to prevent over heating because milk tends to heat up and burn during saponification.


After 48 hours, it was time to cut!


Done! Luscious handmade soap. My baby's going to be so spoiled.

Oh, a bit of an anti climax though - we need to wait one month at least for this soap to cure before it can be used! Curing allows full saponification to occur, so the lye will be completely neutralised and no longer caustic to the skin, and also the soap will dry and harden making it longer lasting. Oh man....

Coming up next - more soapmaking and also liquid soapmaking. Stay tuned!

Tuesday, February 26, 2013

Homemade baby cloth wipes

I'm 5 and a half months pregnant now and at what you might call a baby-moon stage where I'm somewhat more productive, feel healthy and am probably at the nesting stage too considering I'm slightly more organised than I usually am. Great time to be making something for the baby today, I thought. We have decided to fully cloth-diaper this time. With Adam and Mia, we only partially cloth diaper and didn't have enough CDs for fulltime. This time insyaAllah I am determined to cloth diaper Baby no 3 fulltime. Both my babies are fully toilet trained for a long while now so I have no ideas yet on the latest reliable brands of CD or how to cloth diaper a newborn, so if you have any tips, please leave a comment! I'd really appreciate it.


Anyway, I was thinking about CDs today and went digging in my sewing room to find anything I could use to make some CDs, maybe. I found this 2meters length of blue cotton flannel. I bought this at Adam's request a couple years ago when I was sewing a bed set for his birthday. He specifically asked for this fabric, 'to make into my selimut', were his exact words, which I thought at the time was pretty smart for a 3 year old because flannel does make great blankets. However I ended up sewing a quilt cover instead for him using another fabric, so this flannel has been sitting in my shelves ever since. I thought it would totally make lovely absorbent baby cloth wipes.


I set out to make full use of every inch of this 2 meters flannel. Afterall you can never have too many wipes, can you, especially with newborns. They pee and poop ALL THE TIME.

If you want to make these wipes too, basically what you need to do is just fold up the fabric to find the approximate size that you think might be good for wipes.You don't need a ruler at all. Fold up, look at it, put your hand on it to see if it'll cover your whole hand as you wipe and go by instinct. Then cut. They don't have to be exactly the same sizes either.


I ended up with about 24 pieces of smaller sized wipes which will be perfect for wiping bums and 16 medium sized wipes which can  I thought might be nice as burp or vomit cloths too.


Then all I had to do was serge the edges, and in less than an hour (from cutting to sewing), I was done! 40 wipes in total from 2 meters of fabric. Awesome. I know these will be so useful when the baby comes.

Adam made 4 of these for me and they look just as perfect as mine. He's not new to sewing. After watching me sew for practically the whole 5 years of his life, he has made his own pants, his own apron, some small toys for himself and even little gifts for Mia.


Recently he made these pink pillows for Mia's dollies. His idea and work from start to finish.

Back to the wipes, they would be a great first project for your child if they want to learn sewing and you own a serger.

I think I remember the flannel fabric being quite cheap when I bought it. Maybe I'll visit Nagoya again and buy some more plain flannels in other colours. More wipes in other colours and also, I'm thinking they'll probably make good absorbent kitchen wipes and swaddling blankets for Baby3. This was a very easy project and gives instant gratification. Try it!

Wednesday, February 20, 2013

Homemade shampoo

If you read my blog a few years ago, you would realise that this is not something new for me. I tried simple homemade shampoo using only baking soda before. But shamefully, I turned back to regular shampoo after a while. It was difficult to get used to the no suds and no smell shampoo, my hair felt dry at times and I couldn't find a solution for dandruff.

This time I am determined to try again. 


The recipe is simple - a tablespoon of baking soda to a cup of water. This time I added a few drops of lavender and rosemary essential oils for the lovely smell and these oils help with scalp care and dandruff too. I'm finding it so much better than just baking soda. The rosemary gives it a kind of tingly and refreshing feeling while washing.


To help with dryness I also deep-condition my hair once or twice a week with virgin coconut oil. I love   virgin coconut oil! such a gorgeous smell and so good for hair, skin and for ingestion too. To use VCO for hair I just mix about 5 drops of lavender essential oil to about 1 oz of VCO then use about half a teaspoon each treatment. Sometimes I use VCO on it's own, no lavender. Basically I just massage the oil into the scalp and hair just before bedtime then go to bed. I wash my hair in the morning. Wake up to naturally beautiful luscious shiny hair!

So far I am loving the new homemade hair routine. If you try this remember to give a few weeks time for your hair to adjust and detoxify. It might feel slightly oily in the beginning. Our hair is used to the SLS and other toxins in our regular shampoo - break up might look ugly at first, literally! Give it time and you can have beautiful healthy locks free of chemicals.

 I have plans for other haircare treats so watch this space!

As you can see the last few posts have been about natural bodycare. I'm in the zone and if you're not a fan I hope you'll forgive me :)

I've done a lot of experimenting recently..


Playing with lip balm colours - all natural colours. In the above picture I used red clay, roselle and purple gromwell in different strength and combinations.


above : experimenting with different shea butter textures and recipes

Saturday, February 6, 2010

Cloth Pads and more dresses

I didn't really think/plan much about post-natal pads..just bought some disposable ones. But right after I gave birth, and took my shower...immediately it struck me how much more comfortable it would've been if i had some cloth pads..because disposable pads are soooo uncomfortable after birth especially if you had stitches! They have these sticky wings..and then sticky2 melekat pulak to your sore skin...ouch! For normal period it's not so bad..but post-natal..eugh..that area is especially sensitive...

upon getting home from the hospital..i immediately bought some cloth pads..tapi just arrived today..lah lambat baru nak try kan...takpelah...feels so much better! can't comment on the performance yet though..tapi comel kan pads ni..hehe..looks very easy to sew actually...bolehla buat sendiri lak pasni..

here are some pics of Mia in more dresses...

Mia in her ruffle dress

Mia in her Itti Bitti dress

cepat je Mia dah tembam kan...muahs!

Thursday, December 18, 2008

Simple Living -Cloth Diapers

Remember my first post on simplifying, i said i want to try Cloth Diapers...but at the time thought that it was too big a step to take..but someone (Thanks Farrah!) gave me a slap on the face (not literally!) when she told me that 1 disposable diaper takes 500 years to decompose! 500 years!! imagine how many dispo Adam has had the past year...oh God..i just HAD to do something...make a move, even if small...

So i studied CDs and with help from Farrah and many other helpful CD mommies, i bought some Bum Genius pocket diapers from My Baby Pittstop. The owner was nice to work with. Here are the CDs..


the top one is Clementine, which is my favourite. it actually looks like a very pretty yellow, not orangey like the pic. the other two are Moonbeam and Ribbit..both very nice colours and prettier in person. sorry i tak pandai pakai my hubby's camera..the closing on these diapers are Velcro..


This is the inserts that came with each diaper. looks and feels like towel. it's microfiber and the labels says 70%polyster and 30%nylon i think...

this is how the pocket looks like. this is where the insert above are inserted in. you can see the kilat2 kat dlm pocket tu kan.. that's the laminate on the PUL outside layer that makes it waterproof...


I've only tested them once last weekend..tak berani nak kasi nursery lagi...i'll try until i myself feel confident firstlah :)


Testimonial: So easy to use. Exactly like normal dispo diaper. It didn't leak at all. fits nicely. In terms of handling the poo-poo, i find it not so bad actually Of course Adam decided to poop within the first half hour of wearing the first diaper (Clementine! tak sempat i nak amik pic dia pakai...heheheh) i scraped the poo-poo out into toilet bowl with a plastic spoon and just flush. the stain i sprinke with bicarb (yes, another use for bicarb, it will prevent staining and absorb the smell) and put in a dry pail. later just toss everything into the washing machine and wash with half the amount of laundry detergent together with his other clothes ..


then when i check after the cycle is done, there's still some staining. So i brush a bit by hand, then put again in WM in the rinse cycle...came out clean and fresh..

great! at least now i know a little bit more about CDs..i'm not scared of them anymore! hopefully slowly we can transition into full-time CD-ing! even the CDs i tgk mcm senang je nak jahit..if only i have the fabric..i will definitely try to make them...
P/S: Chun and Faie, try la CDs since baby lahir lagi nanti..au naturale! senang, tak susah rupenye...nnt kalau kite jumpa2 aku bwk CDs ni korang boleh pegang2..heheh...

Wednesday, December 17, 2008

Simple Living - Homemade Shampoo

When i learned about simple living, i realised that the key to simplifying would be to take small steps which are not overwhelming but will in turn lead to other things. I researched and i thought that the first step that is most appealing and most reachable are homemade shampoos. i was already running out of shampoo at the time and i thought, why not make my own?

This website has good information on how you can chuck your commercial shampoos and why it is better for you and the environment.
This is the recipe i use to replace shampoo;


Homemade Shampoo
1 tablespoon sodium bicarb
1 cup warm water
i normally make enough to fill up the bottle above and keep it in the bathroom. will last me about 3-4 washes. otherwise you can take a tablespoon bicarb in your hand in the shower and just make a paste with warm water and work it through your hair with your fingers. the mixture feels slippery in your hair, but doesn't make suds though, unlike normal shampoos, but this is ok since you do not actually need the bubbles to get your hair clean. after rinsing your hair will feel really clean, like squeaky clean. i got the sodium bicarb from a local bakery items shop for rm3+ per kilo. i also found about a million other uses and benefits of bicarb but i don't remember which website, i will update later on bicarb.


i also use a homemade conditioner rinse afterwards.


Homemade Conditioner
1 table spoon Apple Cider Vinegar (ACV)
1 cup warm water
use about the same amount as the shampoo. sometimes i use the conditioner, sometimes i don't. but with conditioner my hair feel softer and smoother, just like normal conditioner la. the mixture smells like diluted vinegar, which i don't like but after rinsing smells just apple-ly, which is ok by me and doesn't smell after it dries. you can add some essential oil if you like to this rinse. i don't have any and i just go without.

this website has great information on ACV and its many health benefits and usage around the house. i got the ACV for rm5+ per bottle from Cold Storage. they have a good selection of ACV.


Testimony: after using these homemade haircare routine for 3-4 months, i am loving it. in the beginning not so much because my hair was getting rid of all the accumulating old commercial shampoos, and getting back to its natural state. once i get pass that stage, my hair feel softer and natural, i love it! don't miss my old nasty chemicals-filled shampoos and conditioners at all! i do however have problems with dandruff which i've always had even when i used anti-dandruff shampoos. i noticed that if i went without washing my hair with the above routine more than 3 days then i start to get dandruff. if i wash at least every 2 days i should be ok. next step is i want to try using full force ACV treatment since it is suggested to get rid of dandruff.

recently i have started Adam on this routine too. his hair looks soft as normal too. maybe one day my hair will reach that natural baby-soft hair again...??hehehe...


back to nature...i'm loving it! you guys can try it too! plus it is sooooo frugal! imagine, for the above, i've only spent rm 3+ for bicarb and rm 5+ for ACV and free recyled bottles. and with that, i have enough supplies to make shampoos for the next...1 YEAR probably! imagine how much money i'm saving on not buying commercial shampoos...plus, i know my hair is cleaner and i'm doing my hair and the environment some good by saving them from nasty chemicals!

Tuesday, November 25, 2008

Simple Living : What i am already doing

I shall start my simple living plans with things I am already doing, to motivate myself to keep doing them. I'm sure many ppl are already practising these things..

  1. Breastfeeding – So simple, green and frugal! Of course being a working mom creates the need for pumps, but from the money I’ve saved by not buying a single tin of formula, my pumps have already paid for themselves. Lets do a simple calculation. Ok I don’t really know how much formula costs…hehe..i think Along mentioned it’s about rm55 per week, so..rm220 per month. Adam is almost 14 months old…so in total I’ve saved RM3080!!! My plan is to breastfeed him until he’s 2 years old, God willing, so by then I would have saved…RM5280!!! (btul ke aku kire ni..) So lets say I have more than 1 kid….how much can I save?? And that is just money-wise…Remember the China-formula incident?? God, that made me think how lucky I am that I don’t need to give my baby formula…just think of all the goodness of ‘liquid white-gold’ that Adam would’ve had by the time he’s 2…alhamdulillah…

  2. Sewing – I’ve said time and time again how much I enjoy sewing. It is such a therapeutic and rewarding hobby. Not only do you get the soothing joy of the sewing process, you also get a beautiful craft as a result. It is the essence of a simple life. You can mend and refashion old clothes – I need to remind myself to do this instead of buying more clothes I don’t really need. You can sew your own pillows and curtains and bags etc at a fraction of its cost. Now sewing has even started to generate extra income for our family…alhamdulillah..

  3. Co-sleep – I don’t know if this actually fits with simple living but I think it does. We don’t need a cot, or an expensive king-size bed, the whole family just snuggle together on the floor on natural cotton mattress. It just came naturally to us even though before Adam came we bought a cot thought we needed it. Co-sleeping compliments breastfeeding and means more sleep for me! (since I don’t have to get up to feed baby or check on him).

  4. Homemade babyfood – Thank God for this website! I always suggest this website to anyone who wants to try out homemade baby food. Commercial baby food are not only expensive, they contain additives that we can’t even pronounce! I’m not sure how much money I’ve saved by preparing my own baby food…if you visit the website, you’ll see that it is manageable even if you’re busy too..

  5. Babywearing – The way of life in the olden days. I’m glad that it’s now gaining popularity. And also happy that I am now contributing to helping others wear their babies too..

Ok these are what I’ve been practicing before I discovered, or rather was reminded of, simple living. I will share more things later on what I’ve tried out....

Friday, November 21, 2008

Simple Living - Introduction

We live in a world of consumerism. Everyday I spend my money on things I want, rather than being thrifty and spend only on things I need. Our lives are so polluted, and we don’t even know it. For a while now I’ve been thinking a lot about changing our lives slowly – to simplify, to live more naturally, to be frugal, to be greener. How?

There are so many goals I want to achieve, some of them are;

- To pay off our debts – make budget, live within budget, reduce spending on unnecessary items, reduce grocery/food bills, etc.

-To get rid of all the chemicals in the house – living with a baby and now toddler makes me realise the urgency of getting rid of so many hazardous item in the house. Floor cleaner, toilet cleaner, detergents, shampoos. These things are not good for the environment, what more if they come into contact with your baby. I’m looking into natural, green cleaning and starting to incorporate them in our house to replace these chemical cleaners.
-To cook nutritious food from scratch – prepared processed food are full of so-called ‘permitted’ additives, preservatives, coloring etc. No wonder we cancer is spreading like mushrooms nowadays. I want to start stockpiling, buying fresh staples, organic whenever possible and eat healthily, as well as saving money by not eating out anymore (or less eating out at least). I struggle on this idea because of time constraints. But I really want to achieve this. For now, only Adam gets the luxury of homemade food.

-To purge out the plastics – I would like to start using fabric bags to shop and not accept anymore plastic bags.

To try out CDs (cloth diapers) – many ppl are already doing this. But I’m still clinging on those disposables. Sigh. I can. I can. I will. Maybe next baby? Hehe.

-To start producing my own food for sustainable living – ok this is still far off but I like the idea of growing my own vegetables, fruits, or even just potted herbs. My mom and MIL has chooks, that’s even better. Or maybe cows and goats? Ok that’s too far off..hehe

-To learn new skills like knitting or repairing furniture or sewing curtains – to make and decorate my home with my own hands instead of always going to the shops and buying something ‘Made in China’.

Right, that’s all for now. Lots of things I’d like to achieve but I don’t want to overwhelm myself with too many targets at a time, that is a surefire way to failure. I’ll just start slowly and focus on one goal at a time.

Simple living is an ancient art, really. Back then, during our grandmother’s time, these things were just the way of life. They make do with what they have and they don’t waste anything. They were frugal and creative and they managed to turn their houses into homes with almost no money.

Hopefully this entry will be the start of more entries to come on this topic. I want to start recording here what i am already doing, what I am trying out, what I plan to try out in regards to simplifying my life. If there are any of you who has already practiced simple, natural living, and would like to share, pls do. I need all the motivation I can get. Maybe if I write my thoughts down I’d actually be more committed to doing them =) Although I am simplifying, taking the first few steps isn’t so simple.

LinkWithin

Related Posts with Thumbnails
Message Non-Alert Script: