Tuesday, May 29, 2012
Kekabu chair cushions
This month I've been making a few of these. A simple square pillow filled with kekabu*. When filled up nice and full it is quite comfortable to sit on.
The little erm dots(?) you see are places where I've handsewn in place so that the kekabu stays in place all flat and full, and not run around inside the pillow. This pillow will be used for chair cushions.
The hard part is actually filling up those kekabu because little Mia insists to help and always gets kekabu in her mouth :)
So when the pillow is ready I make a simple pretty cover then it's ready for use.
About time I make use of my Cath Kidston fabrics that has been laying around collecting dusts..
A couple for the chairs in my sewing room..
and one for my husband's workstation at home. He complained his backside was hurting when he saw me making the other two cushions - cheeky!
*kekabu is a tropical version of natural cotton.
Labels:
sewing
Thursday, May 24, 2012
read a Kindle
When I was a child, I loved reading ( I still do). Whenever I come near to finishing a book, I feel quiet reluctant, because it means and soon that book is going to end.
I used to dream that one day, I will invent a little device that contains lots and lots of books. When you finish one book, you click a button and you get another book. So I would never again feel dissapointed at finishing a book.
(try to remember this was a long time ago, before the invention of mobile phones and many other technologies we now take for granted)
So can you imagine my delight at finding out about Kindle? It is my exactly dream device, and more. It's like a childhood dream came true! I almost felt nostalgic..
Of course I wish I did invent it myself.... :)
Thank you my dearest husband, for the best gift ever!
*pictures are of the Kindle cover I made immediately after getting the Kindle. My last Kindle, also a gift from husband was found mysteriously broken. I am not risking this one.
Labels:
sewing
Tuesday, May 22, 2012
Mommy's knitting room
One of the best things about moving back to Malaysia to me is to have my own sewing room. Oh yes! Ideas and inspiration flow so much more when all my beautiful fabric and yarn are neatly(ish) stored and visible to me. Not that hiding scraps all over every nook and cranny of a house wasn't fun ;)
Anyway so I thought of some nice names for my tiny studio and eventually decided to call it what Adam calls it (without even thinking about it, of course) - Mommy's knitting room. Fits perfectly, I think. I made this sign to hang on the door to the room.
The words and image were simple drawn free-hand onto linen, then embroidered using simple backstitch. That's the extend of my embroidery know-how anyway. But the result was exactly what I wanted so I'm happy.
patched up with a bit of precious Cath Kidston. Linen goes great with printed cotton. Then quilted it with a layer of iron on fleece and linen for backing and binding.
to tie it off just a length of Mia's favourite pink polka dot fabric. She was pretty upset with me. hmm.
Alhamdulillah syukur for the luxury of having my own room...the kids like spending time with me in here too :)
Labels:
sewing
morning grammar lesson
Adam was in the shower. Then he came out asking for towel.
Mia: mom! mia amik towel for her...
Adam: HIM! not her! him is for boy... her is for girl...
Mia: ooo..... mom, mia amik towel for him....
Mia: mom! mia amik towel for her...
Adam: HIM! not her! him is for boy... her is for girl...
Mia: ooo..... mom, mia amik towel for him....
Monday, May 21, 2012
Surprise Anniversary Trip - Langkawi
The weekend after we went to Tioman, my husband took us to a surprise vacation in Langkawi. We got married the week after his birthday, so this trip is our 6th year anniversary. Funny how 6 years just whizzed by.
This is the view from our hotel (Westin). He really spoiled us this time. Adam said 'This is the best 'house'* ever!
Cool rock pool in front of the hotel
the children pool
We stayed for 5 days and got to visit all the interesting places in Langkawi.
Kilim mangrove river cruise was my favourite one. I wonder why this place isn;t more popular.
We took a small boat, just the four of us, and it went around the river surrounded by mangrove forest. It was so beautiful there. Reminds me a bit of the Amazon river.
Fish farm, one of the stops along the river
The next day we went on the round island trip and went for a swim in this lake - Pulau Dayang Bunting. Again such beautiful natural surrounding. Wild swimming at its best, I'd say. The lake is situated in the middle of the island, surrounded by trees and it was so serene and calm. Loved it!
My loved ones swimming in the lake. I've been dreaming about lake swimming in Malaysia and this is the first one I've been to! Does anybody have any recommendation for swim-able lakes in Malaysia?
The day after that we went to Telaga tujuh. This is a place with 7 natural wells/pools that you can swim in. When we got there, we found out that you have to hike up a VERY steep hill to get up to it. I'm talking so steep you can probably fall back down the hill. A very difficult feat especially if you have children hiking with you. Half way there, there is a waterfall. When we got to the waterfall we were so hot sweating and out of breath. Then we see this gorgeous waterfall. Subhanallah it was amazing.
Not a lot of people here eventhough it was tourist season. I'm guessing because of the hike. But it makes for a lovely quiet swim. Nice.
There is a little green pool at the bottom of the waterfall. Beautiful. Makes me think of Survivor. (yes i'm a fan)
A lot of people talk about the taxfree shopping when they go to Langkawi but I'm glad that this time we get to discover some of the amazing natural landscapes and wild swimming spots in Langkawi. Alhamdulillah..
Thank you to my darling husband. This has got to be our best anniversary ever. I'm so glad I married you :) Lots of love and thank you for putting up with me for 6 years!!! (can't have been easy hehe)
Labels:
anniversary,
holiday,
the Love of my life,
wild swimming
Friday, May 18, 2012
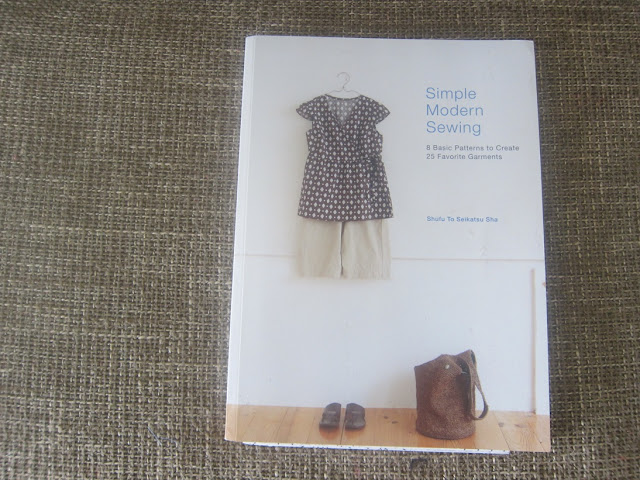
Simple modern sewing - book review and some sewn pieces
Another brilliant japanese sewing book came through my doors recently. This time it's a japanese book that has been translated into English! awesome! I'm sorry the above pic is not very good, but I love this book. The photography is gorgeous, the patterns are simple and yet practical. I feel I could sew and wear quite a number of the pieces. They've put many suggestions on wardrobe assembly and design, on how the pieces could be put together with other pieces from your wardrobe which I thought was rather clever and inspiring.
The first pattern that I tried was this cropped jacket. I made it out of cotton that I already have. I like this piece so much I've worn it countless of times since I made it. It's very light, airy and it's not hot to layer over sleeveless/short-sleeved garments.
The neckline is gathered and tied over with a sash. the patterns calls for gathering down to the bottom of the jacket but it feels better like this for me.
I can't seem to figure out this new blogger interface. Some pictures seem to come out lying down like this. Bear with me, pls. Anyway you can see from the above picture how I wear the jacket. I think I might just make a couple more of this, maybe in some lightweight linen if I can find it.
The book has 8 patterns but there are clever variations of each pattern. This tunic uses the same pattern as the jacket above but it makes quite a different sort of garment.

For the neckline the pattern calls for gathering then enclosing with bias binding. But instead I decided to gather it by using elastic (check out this previous tutorial on Mia's skirt. I used the same technique for the elastic at the waist). This way I can easily breastfeed by pulling it down. Funny how a breastfeeding mama is always thinking about nursing options when looking at clothes.
Two buttons enclosure means you can choose either one depending on how you want to wear it.
I added these gathered pockets as an afterthought and was quite pleased that I did. A functional and also pretty addition to the garment.
Bias binding on the sleeves.
Hopefully there'll be more japanese sewing coming up...
*I bought this book from Book Depository, which is a great place to buy books. They offer free delivery worldwide!
Wednesday, May 16, 2012
How to make a volcano - a tutorial
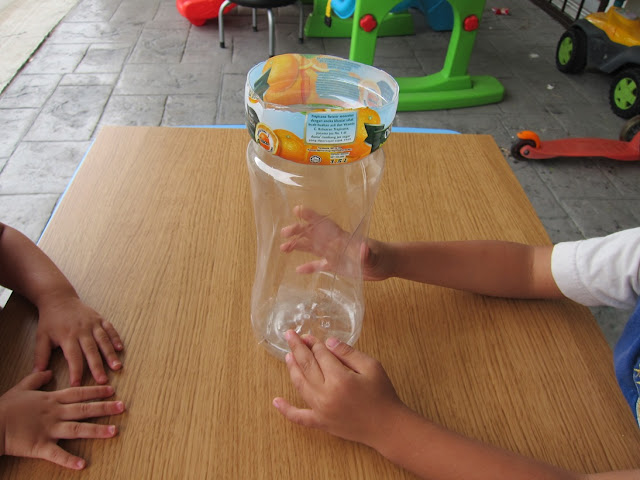
Start by cutting out a third off an empty plastic bottle. Tape the bottom of the bottle onto a board.
Crumple up newspapers into balls and tape around the bottle making the rough shape of a volcano.
Make a paste of flour and water. Cut newspapers into long strips, dip into this paste and then wrap the strips around your volcano.
Keep wrapping layers upon layers.
You can make ridges or bumps or whatever you like. Then let it dry overnight. (it needs to dry fully. Warn the kids about this before you start)
The next day, paint your volcano. Let it dry. Then the experiment can start.
Volcano eruption recipe:
1 tbsp of bicarbonate soda - Place this inside the bottle
mix together separately -
1/4 cup of water
1/4 cup of vinegar
a few drops of red food colouring
a few drops of washing up liquid
* Depending on your bottle size, you may need to double of triple up the amount stated above. We doubled up.
Pour this mixture into the bottle. Stay back and watch the eruption!
Full on volcanic eruption. Beautiful!
Have fun!
Labels:
My kids,
tutorials,
unschooling
Wednesday, May 9, 2012
Mia's easy skirts - a tutorial
I made these skirts yesterday for Mia. They took about 10 mins each to sew. I thought I'd do a tutorial here for anybody who'd like to try one. This is a very good choice for a first project if you're learning to sew.
(please excuse the crumpled pink skirt. already been worn and may have a bit of pee on it too. shhh)
Start with measuring your child. You will need her waist measurement and the length of skirt you want. You will cut a rectangle of fabric like the above. The width of this rectangle will be her waist measurement times 2, and the length would be the length of the skirt plus 1.5".
For example Mia's waist was 18" and length of skirt for her was 10". So the size of the rectangle above was 36" x 11.5".
Sew up the side and zigzag stitch/serge the edges.
Press the seam to one side.
While you're at the ironing board, press the bottom hem of the skirt. To do this fold up by half an inch, then then fold again by half an inch to enclose the raw edge.
Sew the hem.
Now zigzag stitch or serge the top edge of the skirt (not shown in pic). Then mark the top edge at four places (divide skirt into four equal sections. Or more sections if you're making a bigger skirt)
Get a length of elastic that is your child's waist measurement minus 4". Mia's was 14" long.
Sew it up into a circle using a zigzag stitch like the picture above.
The mark the elastic into 4 sections and mark.
Fold down the top of the skirt by half an inch and enclose the elastic in it, pinning at 4 places that was marked. Sew over the top of this enclosure (yes sew over the elastic) using a wide zigzag stitch while stretching the elastic to fit the fabric. See picture above. To do this start by stitching a few stitches at the first pin, remove the pin, the hold onto the next pin stretch the elastic to fit the fabric.
This may seem difficult to imagine, but trust me it is wayyy easier that making a loop to insert the elastic into. ( I hate threading elastic into the waist. and the elastic always likes to curl up or down or all over the place )
This is what it will look like from the inside when you're done.
And from the outside. Quite an even neat finish.
Tadaa you're skirt is done.
Happy sewing!
Subscribe to:
Posts (Atom)
Message Non-Alert Script:


